An incubator is a kind of box, the main function of which is to maintain special conditions for “hatching” eggs. Incubation is a rather interesting and extremely time-consuming process that requires certain skills and knowledge. Without this, one should not expect good results and high hatchability.
How to choose and prepare eggs?
For good results, you need to know everything about the correct selection and storage of material for incubation, as well as how many days it takes to hatch the chickens. When selecting eggs, follow these guidelines:
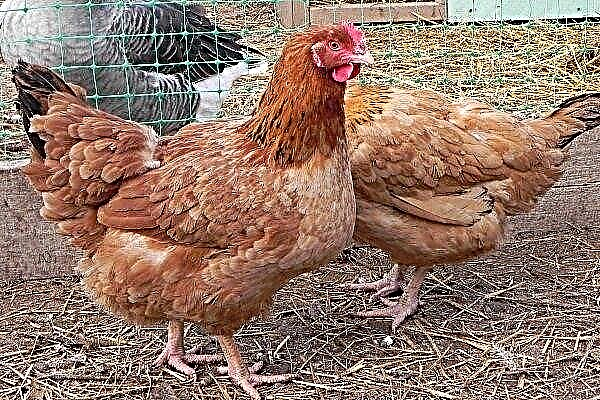
- Productive and healthy chickens are chosen, as poor heredity can go to the offspring.
- The optimal weight is from 56 to 63 g. Eggs weighing higher or lower are rejected. It should also be borne in mind that the laying of eggs in the incubator should be uniform due to the fact that each gram adds from half an hour to 40 minutes for the development of the chick.
- Nutrition must be natural.
- If the hens are egg, then you can pick up eggs starting from 7 months, if meat, then from 8-9 months.
- The shape of the eggs must be correct - clearly defined ends, smooth transitions.
- You can collect eggs from 7-8 in the morning.
- For incubation, they take exclusively fresh eggs - not older than 3-4 days.
Too large eggs are not suitable for incubation for the following reasons:
- worse ventilated;
- the shell is much thinner;
- low percent hatchability.
Ovoscopy
Ovoscopy is considered a reliable method for checking eggs - it helps to find pathologies that are problematic to see with the naked eye. It is a transillumination of eggs using a special device - an ovoscope. A check is needed to detect possible developmental abnormalities in embryos.
All eggs in which these defects are found must be removed. For example, eggs with cracks should not remain in the incubator, because even a small crack can provoke the development of bacteria and infection of eggs.

The device itself can be either purchased or home-made, which does not interfere with its effective use in the household.
The procedure is carried out in a special room as follows. The egg is taken in the right hand and, raising it to the ovoscope, is rotated along the longitudinal axis. Next, the eggs that have passed the test are laid out in trays and sent to the incubator for disinfection on the egg carrier.
Defects to pay attention to during an ovoscope check:
- light streaks as a result of damage;
- dark spots;
- spotty marble structure of the shell, which indicates a lack or excess of calcium;
- blood clots;
- foreign objects, such as feathers or grains of sand;
- twin yolk;
- the yolk broke and mixed with protein;
- the yolk is dry (fixed in one place).
- cracks and growths;
- hollows and pimples.
Egg storage
When storing eggs, consider several nuances:
- In the chicken coop, the presence of a rooster is desirable.
- Keep the eggs blunt end up.
- Once every three days, the eggs are turned over to prevent the yolk from sticking to the shell, moving it, to minimize the likelihood of stretching and breaking off the protein strands that hold the yolk in the center of the egg:
- when placed vertically, the coup occurs from the sharp end of the egg to the blunt;
- with horizontal - eggs are turned 180 degrees.
- If the incubator does not have an automatic flip function, it is recommended to mark the top and bottom for the convenience of further turning during incubation.
- When the egg is stored for less than 3 days, the storage temperature should be up to 18 degrees. If longer, then the temperature drops to 8-12 degrees.
- The maximum shelf life is 6 days.
If eggs need to be stored longer, they are laid out in a special moisture-resistant and gas-tight package (dacron or dacron-polyethylene sealed bags). Place them in rooms with a temperature of 10-12 degrees. Thus, the shelf life is increased to 14 days.
If short-term storage is planned, then storage of raw materials in rooms where the temperature reaches up to 20 degrees is allowed. But it should be noted that for more than 5 days, raw materials should not be kept there. Humidity is maintained at a fairly high level - 75% is considered the best indicator.
To understand how the level of hatchability changes during storage under standard conditions, depending on the duration of storage of the material, you can use this table:
Shelf life, days | Percentage of hatchability,% |
6 | 92 |
10 | 82 |
15 | 71 |
20 | 23 |
25 and more | 15 |
Egg disinfection
The dirt from the eggs is washed off with a cloth, which is previously wetted in a solution of potassium permanganate. After this, disinfection begins. For large batches, formaldehyde vapor is used - 2,530 ml of the substance are diluted with the same amount of water and another 30 mg of potassium manganese is added.

A vessel with a solution that is enough for a cubic meter of incubator is placed in a disinfection chamber with eggs. A tight-fitting box can be used for the camera. Disinfection takes up to half an hour.
There is also a wet disinfection. For it, 25-30 percent bleach is used. 15-20 g of substance is taken per liter of water. A couple of hours before laying, the eggs are placed in this solution for 3 minutes.
There are many conflicting views on whether to wash eggs before laying in an incubator or not. Read about it here.
Incubator selection
For a high-quality hatch of chickens, it is important to choose the right and reliable device.
By capacity, incubators are divided into:
- Professional - up to five hundred eggs.
- Industrial - the number is not limited, everything depends on the size of the room. The disadvantage of such incubators is that if a breakdown or a power outage occurs, the entire brood will die.
- Homemade (Farm) - accommodates from several tens to one and a half hundred eggs.
The incubator selection criteria are as follows:
- manual or automatic maintenance of humidity or temperature;
- case material;
- capacity;
- way to turn the trays;
- is there any insulation;
- Can I connect backup power?
The main functions of a quality incubator are:
- maintain the required level of air humidity with an error of not more than 5%;
- keeping the programmed temperature within the permissible fluctuation - not more than 0.1 degrees;
- egg rotation at a set time;
- providing cooling in case of overheating;
- ventilation in accordance with the established program;
- sound signal if the incubator gives a technical malfunction.
Preparation for use
At least 12 hours before the start of incubation, the device must:
- to clean;
- to wash;
- disinfect;
- heat to the desired temperature;
- install elements that will maintain the desired level of humidity;
- check the ventilation.
For cabinet incubators, formaldehyde vapor disinfection is suitable. Before starting, the temperature inside the box is checked using a conventional medical thermometer. The technique and modes of incubation are described in the instructions for use.
Egg laying
You can start laying eggs without taking into account a certain time of day, however, most farmers still lay in the evening (about 6 hours, since in this case the peeling starts in the morning on the 21st day, and by the evening of the same day the bulk of the chickens born).
Eggs that were selected for incubation must be indoors before immersion in a box. This is due to the fact that if the eggs are immersed in a heated chamber, condensation may form, which violates the climate inside the incubator and leads to mold, which is fatal for the embryo. Therefore, 8-12 hours before the start of incubation, the eggs are kept in a windproof room at a temperature of 25 degrees.
Spread them preferably horizontally. Under these conditions, the eggs warm evenly. A vertical tab is also available - eggs are laid out in groups at regular intervals (4 hours). First, large, then medium-sized and then small.
From the very beginning of laying until the 19th day of incubation, the eggs must be turned 180 degrees every two hours. Only the output trays do not need to be turned over.
That is, in general, the bookmarking procedure is as follows:
- the incubator warms up to the desired temperature;
- eggs are treated with an antiseptic or disinfected with ultraviolet light;
- distributed along the tray with the sharp end up;
- the tray is immersed in an incubator;
- the door closes tightly.

More useful information about laying eggs in an incubator can be found here.
Stages of incubation and care features
In general, egg incubation lasts about three weeks. Sometimes longer if the temperature was below acceptable values, but the limit is 25 days. By default, these three weeks are divided into 4 periods:
- 1st period - the first or seventh day of incubation;
- 2nd period - from the eighth to the fourteenth day;
- 3rd period - from the fifteenth to the eighteenth day (usually at this time you can hear the squeak of chicks not yet hatched);
- 4th period - from the nineteenth to the twenty-third day (this is the final stage, which ends with the hatching of the chicken).
During incubation periods, it is important to observe the appropriate temperature and humidity levels, because all this directly affects the development of the embryo.
To prevent the embryo from overheating, the eggs must be cooled. Cooling is carried out on the sixth and fourteenth days and when the eggs are already transferred to hatcher trays. There is also daily short-term cooling - the cabinet doors open for 5 minutes.
Let us consider in more detail the stages of incubation of chicken eggs:
- On the first day, the temperature in the incubator is set from 37.8 to 38 degrees, and humidity - 60%. These indicators should remain unchanged in the first week, since stable and comfortable conditions are needed for the formation of embryos. It is also important to turn the eggs 4 to 8 times a day.
- 8-14 days. Humidity decreases slightly (up to 50%), and the temperature remains the same. At this time, the embryonic respiratory organ should already close. Turn eggs as before from 4 to 8 times a day.
- In the third stage of incubation, you can start airing, thereby lowering the temperature inside a little. It is enough to air only a couple of times a day for 10-15 minutes. And of course, don't forget to flip eggs. Humidity in this period decreases by another 5% - up to 45%, and the temperature is still 37.8-38.0 degrees.
If development proceeds normally, then the air chamber occupies about 30% of the egg, and the border is curved by a tubercle.
- When the fourth incubation period begins, the temperature inside is lowered to 37.5-37.7 degrees, and humidity, on the contrary, is raised to 70%. In this period, a slight bite begins. Eggs do not need to be turned over, the distance between them should be as large as possible, and good air circulation must also be ensured.
- On the 21st day, the chick begins to bite - it flips counterclockwise, rests its weight on the walls of the shell and breaks the shell in about 3 strokes. When the chicken has hatched, it must dry on its own, after which it is placed in a warm, dry place.
The health of the chicks is determined by the sound of a squeak - if it is a calm and monotonous sound, then everything is in order. If the sound is loud and heavy, it means that the chicken is cold.
There are the following signs by which you can determine a healthy chick:
- The umbilical cord should be soft:
- tight stomach;
- powerful legs;
- slightly convex clear eyes;
- shows activity;
- the beak is short;
- there is a reaction to the sounds.
About violations in the development of the embryo indicate:
- peeling of the shell, which is under the shell;
- fetal freezing (determined from the seventh to the fourteenth day of incubation);
- blood rings (fetal death during the first to sixth day of incubation);
- non-hatching of chickens after incubation is completed, which may be caused by a violation of the incubation regime - temperature, humidity, hypothermia;
- blood vessels did not appear after the sixth day of incubation;
- squirrel and yolk burst and mixed;
- colony mold.
Ovoscopy of eggs by incubation days is carried out as follows:
- On the third day, the yolk and the air chamber at the blunt end are visible.
- On the fourth day, you can see the air chamber at the blunt end, as well as hear the fetal heartbeat and the beginning of the development of blood vessels.
- On the fifth day - an increase in blood vessels by more than half the egg. This indicates the active development of the embryo.
- On the sixth and seventh days, embryo movements are visible, blood vessels fill almost the entire egg.
- On the eleventh day, the blood vessels are clearly visible, the egg no longer shows through as well as on the seventh day, and has a darker shade.
- Fifteenth day - the egg has become even darker, the translucent part has blood vessels.
- Nineteenth day - the egg is almost not visible, the embryo is almost completely developed, the air chamber is clearly visible.
Embryo development
It is important to understand how the process of development of chicks in the embryo occurs. It all starts with the development of a blastodisc - the cytoplasm, which is located on the yolk. Blastodisc, which were fertilized, begin to divide during the formation of the egg in the body of a laying hen. If after the egg has been laid, it falls into favorable conditions, then the embryo develops in stages:
- An amnion begins to form (a shell filled with a liquid that protects the embryo from physical damage or drying out by regulating the amount of liquid under the shell) and allantois (the germinal organ of respiration that lines the entire interior).
- On the third day, the head stands out, and already on the 4th appear the rudiments of the legs and wings.
- From the eighth to eleventh day, a skeleton is formed, the beginnings of the beak and claws appear.
- On the 11th day, allantois completely closes, and the embryo moves along the long axis so that its head becomes directed to the blunt end. In the sharp edge is protein. Due to the fact that the chick moves, in combination with the weight of allantois, the protein enters the chick's mouth, which, in turn, provides a process of rapid growth and development.
- From the 13th day allantoins take all the nutrients that are necessary for growth from the shell.
- From the 12th to the 20th day, the embryo begins to become covered with down, claws - the stratum corneum. Protein is used up completely during growth, and the yolk sac is completely retracted.

The development of the embryo by day is presented in the following table:
Development | Appearance day |
| Circulatory system | 2 |
| Pupil pigmentation | 3 |
| Rudiments of limbs | 3 |
| Allantois formation | 4 |
| Beak shape setting | 7 |
| Feather dorsal papillae | 9 |
| Beak formation end | 10 |
| Allantois closure | 11 |
| The appearance of a gun on his head | 13 |
| The appearance of a gun on the body | 14 |
| Finish Using Protein | 16 |
| Stretching the yolk | 18 |
| Move the neck to the air chamber | 19 |
| Eye opening | 20 |
| The start of the bite process | 20-21 |
Possible errors and difficulties
Having taken up such an occupation as incubation, it is impossible to avoid mistakes, especially if the person is new to this business. The most common errors are:
- Ignorance of the incubator's working scheme. Some try to hatch the chicks, not understanding enough how a particular device works.
- Do not keep a table (diary) of incubation of eggs. The table looks as follows (values are put down daily):
Period
Dates, days
Temperature degrees
Humidity%
The number of turns per day
Airing 1
1-7 38,0-38,2 70 4
2
from 8 to 14 37,8 60 4-6
3
from 15 to 25 37,8 60 4-6 2 times a day for 15-20 minutes
4
26-28 37,5 up to 90
- Non-compliance with temperature conditions:
- when overheated, the chicks can hatch before the due date, as a result of which the chickens from the brood will be small, weak and with a poorly overgrown umbilical cord;
- at low temperatures, hatching begins later, which is why chicks have low mobility;
- at high humidity, the hatching process is delayed;
- at low humidity, the air chamber may increase, leading to premature biting.
- Violation of the shelf life. The maximum period is two weeks, the optimal is up to 5 days.
- Inhomogeneous bookmark.
- The eggs do not roll over (due to which the embryo may stick to the shell).
- Poor preparation. No one checks the eggs, and they are placed in an incubator with defects that should not be. The incubator itself is not prepared according to the rules.
- Incorrect incubator placement (uneven surface, draft).
This video provides step-by-step instructions on the process of incubation of eggs - from the choice of material to hatching of chickens. These tips are suitable for both beginner breeders and experienced farmers:
Engaging in chick-raising is not too difficult. However, the correct preparation of eggs for incubation, their selection and control of the microclimate throughout the entire incubation period is extremely important. If all the rules are followed, then as a result, chickens are easily hatched, even at home.
Posted by
6
Ukraine. City: Mariupol
Publications: 22 Comments: 0